

Game Project
Cheesecalibur
This was a project done for class, developed over 2 months. It is a 3D hack-and-slash with 2D sprites for environments and characters. Below I'll go over the character controller, and enemy AI scripts, as these are the most important parts I developed for the game.
Character Controller (PlayerMovement.cs & PlayerAttack.cs)
To keep the classes used smaller, I decided to break the controls for the player character into two parts. One would control only the movement, while the other one would handle the attack. This might not have been the best idea, since it did cause some issues down the line when they eventually "fought" over who called the animations. As they say, hindsight is 20/20. I am satisfied, though, with how I solved a few things, even if they don't work 100%, and I didn't have time to fix them before the deadline. I have full intention in returning to this project at some point, perhaps even starting from scratch, as the concept is something me and my teammates are very proud of.
For this game, I used Unity's new input system, but perhaps in not the most appropriate way, as I was learning as I went. And even by the end, still didn't fully grasp the functioning. It's not as intuitive as seeing the "GetInput" within the code from the old system.
In any case, let's get right into it. We'll begin by looking at the movement. It has two parts to it. The movement itself, and a dodge
public class PlayerMovement:MonoBehaviour
{
private Rigidbody rb;
private PlayerControls playerControls;
[SerializeField] private float moveSpeed= 5f;
[SerializeField] private float dodgeSpeed= 100f;
private float dodgeCurrSpeed;
private Vector3 dodgeDir;
public static bool isDodging { get; private set; }
private bool onCD;
[SerializeField] private float dodgeCD;
[SerializeField] private float invulnerabilityWindow;
private bool facingLeft = true;
private Vector3 2Dto3DVector;
private Vector2 moveVector;
// We access the input asset made for the new input system
private void Awake()
{
rb = GetComponent<Rigidbody>();
playerControls = new PlayerControls();
}
// Here I subscribe the inputs to their desired methods, adding the .cancelled for the movement so the character won't keep moving after the key/analog stick is let go
private void OnEnable()
{
playerControls.PlayerInput.Enable();
playerControls.PlayerInput.Movement.performed += OnMovementPerformed;
playerControls.PlayerInput.Movement.canceled += OnMovementCancelled;
playerControls.PlayerInput.Dodge.performed += OnDodgePerformed;
}
private void OnDisable()
{
playerControls.PlayerInput.Disable();
playerControls.PlayerInput.Movement.performed -= OnMovementPerformed;
playerControls.PlayerInput.Movement.canceled -= OnMovementCancelled;
playerControls.PlayerInput.Dodge.performed -= OnDodgePerformed;
}
private void OnDodgePerformed(InputAction.CallbackContext context)
{
HandleDodge();
}
private void OnMovementPerformed(InputAction.CallbackContext context)
{
moveVector = context.ReadValue<Vector2>();
}
private void OnMovementCancelled(InputAction.CallbackContext context)
{
moveVector = Vector2.zero;
}
private void FixedUpdate()
{
Move(moveVector);
}
// Here I apply the read values from the input into the player character; since the values are in Vector2 format, I transfer them into the X and Z values of the characters Vector3 coordinates, otherwise, he would fly
private void Move(Vector2 movementVector)
{
if(isDodging) return;
2Dto3DVector = new Vector3(movementVector.x, 0f, movementVector.y);
rb.velocity = 2Dto3DVector * moveSpeed;
if (2Dto3DVector != Vector3.zero)
{
// This was added for the dodge. By changing the forward vector, the dodge always goes in the last direction the player was facing, even if they aren't moving anymore
transform.forward = 2Dto3DVector;
}
}
private void HandleDodge()
{
if(onCD) return;
StartCoroutine(DodgeRoll());
}
// Finally, a coroutine handles the dodge. I start at the max speed and decrease it so it feels a little better. While in the dodge, I give player invulnerability frames by deactivating the collision with enemies. Not the best, but served the purpose at the time.
private IEnumerator DodgeRoll()
{
isDodging = true;
dodgeCurrSpeed = dodgeSpeed;
while (dodgeCurrSpeed > 5f)
{
Physics.IgnoreLayerCollision(6, 7, true);
rb.velocity += transform.forward * dodgeCurrSpeed * Time.deltaTime;
dodgeCurrSpeed -= dodgeCurrSpeed 10f * Time.deltaTime;
}
yield return new WaitForSeconds(invulnerabilityWindow);
Physics.IgnoreLayerCollision(6, 7, false);
isDodging = false;
onCD = true;
// This little part adds a cooldown to the dodge, to keep the player from simply overusing the ability and breezing through the levels
yield return new WaitForSeconds(dodgeCD);
onCD = false;
}
}

Here we have a video showcasing the movement and dodge.
And this is it! There was one more enemy, but I didn't think it was that unique to showcase here. It was basically a small variation on the standard melee enemy. I f desired, it can be seen in the repo, under the name EnemyMosquito.cs.
While these enemy AI have their issues, and might not be the most elegant or function perfectly, I was in any case quite proud of my results. I managed to get something working for out project in a relatively short amount of time, with no previous experience. I had to figure out and learn while doing, and I really do believe I achieved something decent here.
Now the appropriate showcase.

// Damage is the first change for this enemy. To sell the idea of a bulkier enemy, we decided it would only take damage if the player's attack was either a critical strike (random chance) or if their weapon was already upgraded and dealing a base 2 damage.
public override void Damage(float damage, bool isCrit)
{
if(!IsAlive) return;
if (damage >= 2 || isCrit)
{
health -= damage;
Transform damagePopupTransform = Instantiate(_damagePopup, transform.position, Quaternion.identity);
DamagePopup damagePopup = damagePopupTransform.GetComponent<DamagePopup>();
damagePopup.Setup(damage, isCrit);
}
if (health <= 0f)
{
Die();
}
}
// This enemy works similar to the ranged enemy, but instead of fleeing if the player is too close, it changes the attack animation and functioning. I included them here to illustrate the difference in the attack
protected override IEnumerator Attack()
{
isAttacking = true;
if (playerDistance < attackRange && playerDistance > distanceThreshold)
{
anim.CrossFade(RangedAttack, 0, 0); // This will trigger an animation event that calls the same ShootProjectile() method as the ranged enemy
yield return new WaitForSeconds(attackCD);
isAttacking = false;
}
else if(playerDistance < distanceThreshold)
{
anim.CrossFade(MeleeAttack, 0, 0); // This will trigger an animation event that calls the same DamagePlayer() method in as the parent script
yield return new WaitForSeconds(_attackCD);
isAttacking = false;
}
else if(playerDistance > attackRange && playerDistance < enemyDetectionRadius * 1.5f)
{
isAttacking = false;
SetState(State_Chasing());
}
else
{
isAttacking = false;
SetState(StateReturning());
}
}

Finally, let's look at the third enemy type, that is, the mixed enemy. This one changes between melee and ranged attacks depending on player distance.
// The new variables exclusive to the ranged enemy AI
[Header("Ranged Fields")]
[SerializeField]
private float distanceThreshold; // This is the closest the player can get. If they enter this radius, the enemy starts fleeing
[SerializeField]
private Projectile projectile; // Reference to the projectile class, so it can be instantiated on each shot
[SerializeField]
private Transform projectileSpawnPoint; // And the location where it will be shot from
protected override void Awake()
{
base.Awake();
enemyDetectionRadius = attackRange * 1.2f; // First change comes here. Since the attack
}
protected override IEnumerator State_Chasing()
{
agent.stoppingDistance = attackRange;
agent.SetDestination(player.transform.position);
agent.isStopped = false;
// The chasing has this change inside to check if the player got too close, so it became both the "chase" and "flee" states
if (playerDistance < distanceThreshold)
{
yield return new WaitForSeconds(0.8f);
agent.stoppingDistance = 1f;
// It gets the direction of the player, so it can set a destination on the opposite direction
Vector3 dirToPlayer = transform.position - player.transform.position;
Vector3 runTo = transform.position + dirToPlayer (_distanceThreshold/4);
agent.SetDestination(runTo);
while (_agent.remainingDistance > agent.stoppingDistance)
{
yield return 0;
}
}
while (playerDistance > attackRange)
{
if(playerDistance < (_enemyDetectionRadius * 1.4f)) agent.SetDestination(player.transform.position);
if (_agent.velocity.x != 0) renderer.flipX = agent.velocity.x < 0;
yield return 0;
}
SetState(State_AttackingEnemy());
}
protected override IEnumerator State_AttackingEnemy()
{
agent.isStopped = true;
agent.stoppingDistance = attackRange;
// The difference here is that it simply checks if both it and the player are alive, or of the player got too close. The distance checks to decide if it needs to get closer are done within the Attack() coroutine
while (player.IsAlive && IsAlive)
{
if(playerDistance < distanceThreshold)
{
SetState(StateChasing()); // In this case, it is called to "flee"
}
if (!isAttacking) StartCoroutine(Attack());
yield return 0;
}
}
// And here I check the distances
protected override IEnumerator Attack()
{
isAttacking = true;
// If the player is close enough, but not too close, it attacks
if (playerDistance < attackRange && playerDistance > distanceThreshold)
{
yield return new WaitForSeconds(attackCD);
isAttacking = false;
}
// If they are out of range, but still "in view", it starts chasing
else if(playerDistance > attackRange && playerDistance < enemyDetectionRadius * 1.4f)
{
isAttacking = false;
SetState(State_Chasing());
}
// If they're too close, the enemy flees
else if(playerDistance < distanceThreshold)
{
isAttacking = false;
SetState(State_Chasing());
}
else
{
isAttacking = false;
// Finally, if the above conditions aren't met, means the player got too far, se the enemy returns to the spawn point
SetState(StateReturning());
}
}
// And the final addition, the method to instantiate and shoot the projectile. The addition on the Y vector is due to the pivot point of the player being on the ground, so this way we get a projectile that aims better at the mid-point of the player
public void ShootProjectile()
{
Instantiate(projectile, projectileSpawnPoint.position, Quaternion.identity).Shoot(new Vector3(player.transform.position.x, player.transform.position.y + 2, player.transform.position.z),attackDamage, player);
}
// On the projectile, we have the movement and damage logic
public class Projectile : MonoBehaviour
{
// This is initialized from the enemy through when instantiating
public void Shoot(Vector3 destination, float damage, PlayerHealthSystem target)
{
direction = (destination - transform.position).normalized;
damage = damage;
target = target;
transform.LookAt(destination);
}
// Update keeps the object moving, and checks if the target is still there. If there is no more target, or a certain amount of time passes, it destroys itself
// Although a pooling system would be more efficient, due to time constraints, I went with the simpler create-and-destroy functioning. Since it was a very small scale project, and only a few projectiles would be spawned and destroyed, this wouldn't cause any big performance impacts.
private void Update()
{
if (target == null || !target.IsAlive)
{
Destroy(gameObject);
return;
}
transform.position += direction Time.deltaTime arrowSpeed;
timer += Time.deltaTime;
if (timer >= timeToDestroy)
{
Destroy(gameObject);
}
}
private void OnTriggerEnter(Collider other)
{
if (other.GetComponent<PlayerHealthSystem>() != null)
{
other.GetComponent<PlayerHealthSystem>().Damage(damage, false);
Destroy(gameObject);
}
}
}
And here is a short video showcasing the ranged enemy AI
Now on to the inheritors! I'll cut the script to only show the differences added to for the ranged and mixed enemies. First, let's look at the ranged enemy AI.
The basic behaviour is similar: when it detects the player, it moves into range to start attacking. If the player moves out of range the pursuit begins until it can attack again or the player moves too far, making it return to the spawn point. So far so good. Now, the differences. Since it is ranged, it attacks by instantiating projectiles that go in the players directions. I chose a slightly slow speed for the projectile to allow the player to avoid them with efficient movement. The second change is a "self preservation". If the player moves within a distance threshold, the enemy tries to flee. Not indefinitely, though, but just enough to get away from the player's attack range, and back into its own attacking range, to continue firing.
In this video you see in action the different behaviours of the basic melee enemy AI.

public class Enemy: MonoBehaviour, IDamageable
{
[SerializeField]
protected Transform damagePopup;
[SerializeField]
protected SimpleFlash flash;
[SerializeField]
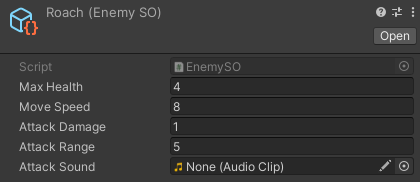
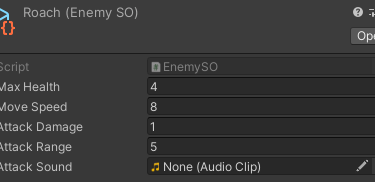
protected EnemySO melee; // Enemies are Scriptable Objects. That way, the designers could create variations on the enemies, choosing the numbers in the inspector
protected float maxHealth;
protected float health;
protected float moveSpeed;
protected float attackDamage;
protected float attackRange;
[SerializeField]
protected float enemyDetectionRadius= 8f;
// This variable references the player. The reason I used this component, is so that I can access the method responsible for damaging the player.
[SerializeField]
protected PlayerHealthSystem player;
[SerializeField]
protected float attackCD= 1.5f;
[SerializeField]
protected SpriteRenderer renderer;
protected Rigidbody rb;
protected NavMeshAgent agent;
protected Coroutine currentState;
protected Vector3 startingPosition;
protected float playerDistance;
protected bool isAttacking;
protected bool IsAlive =>health > 0f;
protected virtual void Awake()
{
// And here we access the values inside the scriptable object
maxHealth = melee.MaxHealth;
moveSpeed = melee.MoveSpeed;
attackDamage = melee.AttackDamage;
attackRange = melee.AttackRange;
health = maxHealth;
startingPosition = transform.position;
rb = GetComponent<Rigidbody>();
agent = GetComponent<NavMeshAgent>();
agent.speed = moveSpeed;
agent.stoppingDistance = attackRange;
playerDistance = Vector3.Distance(transform.position, player.transform.position);
}
protected virtual void Start()
{
SetState(State_Roaming());
}
// During Update, I keep updating the player's distance. That is used to change states in the FSM.
protected void Update()
{
if (!IsAlive) return;
playerDistance = Vector3.Distance(transform.position, player.transform.position);
if(isAttacking) return;
if(agent.velocity.x != 0) renderer.flipX = agent.velocity.x < 0;
}
//This method serves to damage the enemy. It also instantiates the method responsible for rendering damage numbers as a floating popup. If the enemy's health falls below zero, this will also call the Die() method.
public virtual void Damage(float damage, bool isCrit)
{
if(!IsAlive) return;
health -= damage;
Transform damagePopupTransform = Instantiate(damagePopup, transform.position, Quaternion.identity);
DamagePopup damagePopup = damagePopupTransform.GetComponent<DamagePopup>();
damagePopup.Setup(damage, isCrit);
if (health <= 0f)
{
Die();
}
}
// And here is the FSM state changer. This will be called within each state, changing the current state to a new one according to conditions met.
protected void SetState(IEnumerator newState)
{
if (currentState != null)
{
StopCoroutine(currentState);
}
currentState = StartCoroutine(newState);
}
// The initial state. Here the enemy roams around an area around its spawn point. It keeps doing so until the player get's within range (checked in Update())
protected IEnumerator StateRoaming()
{
agent.stoppingDistance = 2f;
while (playerDistance > enemyDetectionRadius)
{
yield return new WaitForSeconds(3f);
var targetPos = RoamTargetPosition(startingPosition, Random.Range(8f, 15f), -1);
agent.SetDestination(targetPos);
yield return 0;
}
SetState(State_Chasing());
}
// In here I get a random point in the navmesh within a certain radius to set the next roaming point of the enemy
private static Vector3 RoamTargetPosition (Vector3 origin, float distance, int layerMask)
{
Vector3 randomDirection = Random.insideUnitSphere distance;
randomDirection += origin;
NavMeshHit navHit;
NavMesh.SamplePosition (randomDirection, out navHit, distance, layerMask);
return navHit.position;
}
// This states makes the enemy chase the player until they are either within the attack range or outside a detection radius (50% bigger than base radius to sell the "chasing the player" behaviour).
protected virtual IEnumerator State_Chasing()
{
agent.stoppingDistance = attackRange;
agent.SetDestination(player.transform.position);
agent.isStopped = false;
while (playerDistance > attackRange)
{
// If the player moves too far, the enemy changes to returning state, which brings it back to spawn point
if (playerDistance < (enemyDetectionRadius 1.5f))
{
agent.SetDestination(player.transform.position);
if (agent.velocity.x != 0) renderer.flipX = agent.velocity.x < 0;
}
else
{
SetState(StateReturning());
}
yield return 0;
}
// If the player moves close, we switch to attacking state
SetState(State_AttackingEnemy());
}
// The attacking state keeps checking if the player is within range with the CheckDistance() and calling the Attack() routine, which simply calls a cooldown on the attack. This method is only supposed to call the animation, but since I used a more custom method, I removed it from here to focus on the FSM itself. The functioning is similar to the Animation Controller from Todd the Tubby Toad
protected virtual IEnumerator State_AttackingEnemy()
{
agent.isStopped = true;
agent.stoppingDistance = attackRange;
isAttacking = false;
while (playerDistance <= attackRange)
{
renderer.flipX = player.transform.position.x < transform.position.x;
if (!isAttacking) StartCoroutine(Attack());
yield return 0;
}
CheckDistance();
}
protected virtual IEnumerator Attack()
{
isAttacking = true;
yield return new WaitForSeconds(attackCD);
isAttacking = false;
}
// And here I damage the player, if they are within the attack range when this method is called from an animation event
public void DamagePlayer()
{
if(playerDistance <= attackRange) player.Damage(attackDamage, false);
isAttacking = false;
}
// This is similar to GetEnemyAroundMe() below, but it can change the state to two different options, and uses the larger detection radius
protected void CheckDistance()
{
if(!IsAlive) return;
if (playerDistance < (enemyDetectionRadius 1.5f))
{
SetState(State_Chasing());
}
else
{
SetState(State_Returning());
}
}
// When returning, the enemy moves towards its spawn point, while checking to see if the player got within the detection radius again.
protected IEnumerator State_Returning()
{
agent.isStopped = false;
agent.stoppingDistance = 1f;
agent.SetDestination(startingPosition);
while (agent.remainingDistance > agent.stoppingDistance)
{
GetEnemyAroundMe();
yield return 0;
}
SetState(StateRoaming());
yield return 0;
}
// This state simply makes the enemy flash on and off, speeding up. It has a purely cosmetic function
protected IEnumerator State_Dead()
{
float time = 3f;
float flashTime = 0.6f;
while (time > 0f)
{
renderer.enabled = !renderer.enabled;
yield return new WaitForSeconds(flashTime);
flashTime = flashTime <= 0.1f ?0.1f :flashTime * 0.8f;
time -= Time.deltaTime;
}
yield return 0;
}
// This method is used to detect the player, by simply checking if the player is within a spherical zone around the enemy
protected void GetEnemyAroundMe()
{
if (!IsAlive) return;
if (playerDistance < enemyDetectionRadius)
{
SetState(StateChasing());
}
}
// This method is called when the enemy dies. It stops and deactivated the NavMeshAngent, and sets the current state to "dead", and finally destroys the game object from the scene after 4 seconds (that is to allow the animation to finish playing)
protected void Die()
{
agent.isStopped = true;
SetState(State_Dead());
agent.enabled = false;
Destroy(gameObject, 4f);
}
}
Enemy AI (Enemy.cs, EnemyRanged.cs & EnemyMixed.cs)
This was my first attempt at building a more complex AI. One with varied behaviour depending on different factors. To do that, I coded a finite state machine (FSM), using coroutines to change between the states of the enemies. I also used inheritance to make the different types of enemies. In here, I'll share the three main ones: a standard melee enemy, a ranged enemy, and a mixed one, that switches attacking mode depending on player distance. And, for ease of implementation, I used Unity's NavMeshAgent for pathfinding and navigation.
The following is the Enemy.cs script, the base script for the enemies. It has the behavious that the standard melee enemy uses. All other enemies inherit from it.