

Game Project
Todd the Tubby Toad

This was my final project in the game development course I took at KPU, in Vancouver, Canada. It is a charming physics-based 2D puzzle-platformer focused around a grappling hook mechanic. Below, I'll go through the main parts I developed for the game.
In this project, what I share all be more technical, as I go through some thought and development process of the different parts of the game.
Note: The itch.io version is what we're calling a demo, as we're in active development for a full release version at some point.
Character Controller & Grappling Hook (CharacterController.cs & Tongue.cs)
The first version of this mechanic comes from an adapted version found on YouTube from the channel "1 Minute Unity" (Link to video). It functioned using a RayCast to detect hit points, and a SpringJoint as the grappling hook, to impart some impulse the character when they attached to a surface. When the player left clicked, the ray shoots from the character towards the mouse position. If it hit an appropriate surface, a second script would get activated to draw the tongue. After the tongue finished drawing, the grapple point would be set, activating the ConnectedAnchor of the SpringJoint.
// This method was called on Update, detecting if a surface in the direction of the cursor was grappleable. This was chosen to also set a cursor that would tell the player if they would be able to shoot the tongue and attach
private bool CanAttach()
{
mouseFirePointDistanceVector = camera.ScreenToWorldPoint(Input.mousePosition) - transform.position;
hit = Physics2D.Raycast(transform.position, mouseFirePointDistanceVector.normalized);
return hit.transform.gameObject.layer == grappableLayerNumber && Vector2.Distance(hit.point,transform.position) <= maxDistance;
}
// This one is called after the left mouse button is clicked, starting the chain that eventually attached the tongue (grappling hook) to a surface to pull the player
private void SetGrapplePoint()
{
if (!CanAttach()) return;
DistanceVector = GrapplePoint - (Vector2)transform.position;
// This enables the script that draws the tongue (Line Renderer)
tongue.enabled = true;
GrapplePoint = hit.point;
}
// Finally, Grapple is called after the tongue finishes drawing, setting the ConnectedAnchor of the SpringJoint, and enabling it.
public void Grapple()
{
springJoint.connectedAnchor = GrapplePoint;
springJoint.distance = (GrapplePoint - (Vector2)transform.position).magnitude * distanceRatio;
springJoint.frequency = launchSpeed;
springJoint.enabled = true;
}

Raycasts worked wonders, being a precise method of obtaining the attach points for the tongue. So we kept it untouched for a time. Unfortunately, problems arose when we decided to implement moving platforms and allow the player to shoot the tongue at them and grapple. My first solution, was simply to detect if the raycast hit a moving object using Unity's tag system for simplicity.
// A new GameObject parameter was initialized for when the player shoots the tongue at a moving platform
private GameObject movingObject;
// If the Raycast identified the hit point as belonging to a moving platform, movingObject would be set as the new object (later set to null after the player detaches the tongue)
private void SetGrapplePoint()
{
if (!CanAttach()) return;
DistanceVector = GrapplePoint - (Vector2)transform.position;
tongue.enabled = true;
GrapplePoint = hit.point;
if (hit.transform.gameObject.CompareTag("MovingObject"))
{
movingObject = hit.transform.gameObject;
}
}
// When Grapple is finally called, it calculates a simple Offset that will be used to update the Connected Anchor position
public void Grapple()
{
springJoint.connectedAnchor = GrapplePoint;
springJoint.distance = (GrapplePoint - (Vector2)transform.position).magnitude * distanceRatio;
springJoint.frequency = launchSpeed;
if (_movingObject)
{
var position = movingObject.transform.position;
var connectedAnchor = springJoint.connectedAnchor;
xOffset = position.x - connectedAnchor.x;
yOffset = position.y - connectedAnchor.y;
}
springJoint.enabled = true;
}
// With the Offset in place, the Connected Anchor's position would be updated according to the movement of the platform
private void Update()
{
if (_movingObject && springJoint.enabled)
{
var position = movingObject.transform.position;
springJoint.connectedAnchor = new Vector2(position.x - xOffset,position.y - yOffset);
GrapplePoint = springJoint.connectedAnchor;
}
}
I questioned for a bit if it was that simple, but the math made sense, so let's check the results:

Ok.... that's not what I wanted...
It took some time, but I figured out what the problem was. There was a delay between the raycast being shot and the moment the attach point for the tongue is finally created. So by the time that happens, the platform would have already have moved causing the issue.
Note: that initial offset between where the cursor (fly) is and the place the tongue was shot I didn't figure out, but it wasn't relevant in the end, since the solution I came up with ended fixing everything.
To fix the issue, I decided to rework the inner workings of the tongue. Instead of using raycasts, I'd use an actual collider.
How the new system would work:
After left clicking, a tiny circle collider is shot from the character, and the tongue would already start drawing while the collider flew. Whenever it came into contact with anything, it would detect if it was an attachable surface and set the connected anchor at the hit point.
This new method would also let me add a little bit of polish, which is have the tongue actually retract, since with the raycast, the tongue simply disappears on mouse button release.
So here are all the working parts for the final version of the grappling hook mechanic.
//We call the methods on Update; SetCursor is going to be explained better below this code snippet
private void Update()
{
SetCursor();
GetInputs();
}
//Over here we get input data to call the appropriate methods. For now it is using the old input system, but I have plans of migrating to the new input system to add controller support
private void GetInputs()
{
//Line simply to add horizontal movement to the character; also lets player swing while grappled
horizontalMove = Input.GetAxis("Horizontal") moveSpeed;
if (Input.GetKeyDown(KeyCode.Mouse0))
{
SetShotDirection();
}
else if (Input.GetKey(KeyCode.Mouse0))
{
ShootTongue();
if (!tongue.enabled) return;
//Here is the same math used previously, but since the delay between shooting the tongue and setting the attach point, it now works correctly
if (movingObject && springJoint.enabled)
{
var position = movingObject.transform.position;
var attachPosition = new Vector2(position.x - xOffset,position.y - yOffset);
springJoint.connectedAnchor = attachPosition;
tongue.transform.position = attachPosition;
GrapplePoint = springJoint.connectedAnchor;
}
}
else if (Input.GetKeyUp(KeyCode.Mouse0))
{
Detach();
}
//These following lines make the tongue retract visibly towards the character, instead of simply disappearing
if(!tongueRetract) return; //this skips the rest of the code if the retract was not called
tongue.TongueDetach();
tongue.transform.position = Vector2.MoveTowards(tongue.transform.position, transform.position, shootSpeed * 2 * Time.deltaTime);
if(Vector2.Distance(tongue.transform.position, transform.position) >= 0.1f) return; // this line makes sure the tongue retracts fully before deactivating itself and clearing the connections
tongue.enabled = false;
springJoint.enabled = false;
movingObject = null;
tongueRetract = false;
}
//This new method serves to simply get the direction from the character to the cursor before launching the tongue collider
private void SetShotDirection()
{
shootDirection = (cursorPosition.position - cursorPivot.position).normalized;
tongue.transform.position = transform.position;
}
//Finally, the collider is shot when this is called; These 2 methods replaced the old SetGrapplePoint()
private void ShootTongue()
{
if (tongueDidntHit)
{
tongueRetract = true;
return;
}
if (tongue._isGrappling) return;
if (tongueRetract) return;
tongueRb.velocity = shootDirection * shootSpeed;
DistanceVector = tongue.transform.position - transform.position;
tongueDidntHit = Vector2.Distance(tongue.transform.position, transform.position) >= maxDistance;
if (tongue.enabled) return;
tongue.enabled = true;
}
//Moving Object now detected on collision, so this was turned into a method that is called from the Tongue.cs scripts within its OnCollisionEnter2D method
public void SetMovingObject(GameObject movingObject)
{
movingObject = movingObject;
}
//Simply detaches the connection between tongue and surface
public void Detach()
{
tongueDidntHit = false;
tongueRetract = true;
}
//Minor change to the Grapple method, to get the position of the tongue collider
public void Grapple()
{
GrapplePoint = tongue.transform.position;
springJoint.connectedAnchor = GrapplePoint;
springJoint.distance = (GrapplePoint - (Vector2)transform.position).magnitude * distanceRatio;
springJoint.frequency = launchSpeed;
if (movingObject)
{
var position = movingObject.transform.position;
var connectedAnchor = springJoint.connectedAnchor;
xOffset = position.x - connectedAnchor.x;
yOffset = position.y - connectedAnchor.y;
}
springJoint.enabled = true;
}
private void SetCursor()
{
mouseFirePointDistanceVector = camera.ScreenToWorldPoint(Input.mousePosition) - transform.position;
hit = Physics2D.Raycast(transform.position, mouseFirePointDistanceVector.normalized, Mathf.Infinity,_layerMask);
//Raycast went beyond the max distance the player can grapple
if (Vector2.Distance(hit.point, transform.position) > maxDistance)
{
Cursor.SetCursor(tooFar, Vector2.zero, CursorMode.Auto);
}
//If the raycast hits either layer 0 or 1, the cursor shows player can grapple
else if (hit.transform.gameObject.layer == grappableLayerNumber[0] || hit.transform.gameObject.layer == grappableLayerNumber[1])
{
Cursor.SetCursor(canAttach, Vector2.zero, CursorMode.Auto);
}
//Otherwise, it show player they cannot grapple
else
{
Cursor.SetCursor(cannotAttach, Vector2.zero, CursorMode.Auto);
}
}
Finally, we can see how the new system works in game (with debug visuals on).

And below, the method mentioned above, that still uses Raycasts. It constantly shoots from the character in the direction of the mouse cursor and detects if it hits a surface that can be attached to, one that cannot, or of there aren't any surfaces at all within range. Then, it changes the cursor accordingly, to tell the player if shooting the tongue will work or not.

Here we see the cursor changing.
Great! That is the main mechanic for the game working as desired.
Next, even if it was working as desired, a new update was added after: we implemented Unity's New Input System. That way we could add gamepad support to the game. I also added some extra key options, so left-handed people could play with mouse & keyboard in an inverted manner, as one of our teachers did (keyboard on right hand, mouse on left hand).
The code below shows all the new additions to listen to player inputs with the new system.
//Here I setup the new necessary variables for the updated input system
private PlayerInputActions input;
private PlayerInput playerInput;
private Vector2 cursorPosition;
private Vector2 movementAxis;
private Vector2 lastCursorPosition;
private bool isHoldingShootButton;
private bool isHoldingGrabButton;
private bool isGamepad;
public static event Action<Device> InputDetected;
public enum Device {Keyboard, Gamepad}
private void Awake()
{
playerInput = GetComponent<PlayerInput>();
}
//Here we subscribe all the inputs to the desired methods, then unsubscribe OnDisable below, using started, performed and canceled according to how it is used
private void OnEnable()
{
input.Movement.Enable();
input.Movement.PointerPosition.performed += OnCursorMoved;
input.Movement.Move.performed += OnMovementPressed;
input.Movement.Move.canceled += OnMovementReleased;
input.Movement.Hook.started += OnTonguePressed;
input.Movement.Hook.performed += OnTongueHeld;
input.Movement.Hook.canceled += OnTongueReleased;
input.Movement.Grab.performed += OnGrabPressed;
input.Movement.Grab.canceled += OnGrabReleased;
input.Movement.Pause.performed += OnPause;
input.UI.Unpause.performed += OnPause;
}
private void OnDisable()
{
input.Movement.PointerPosition.performed -= OnCursorMoved;
input.Movement.Move.performed -= OnMovementPressed;
input.Movement.Move.canceled -= OnMovementReleased;
input.Movement.Hook.started -= OnTonguePressed;
input.Movement.Hook.performed -= OnTongueHeld;
input.Movement.Hook.canceled -= OnTongueReleased;
input.Movement.Grab.performed -= OnGrabPressed;
input.Movement.Grab.canceled -= OnGrabReleased;
input.Movement.Pause.performed -= OnPause;
input.UI.Unpause.performed -= OnPause;
}
#region InputSystem
//This method was added mainly to change the sprite for the visual tutorials at the start of the game, so we can show the appropriate control scheme; this is called on button presses to check which input type (keyboard or gamepad) is currently in effect
private void InputType()
{
InputDetected?.Invoke(playerInput.currentControlScheme.Equals("Gamepad") ? Device.Gamepad : Device.Keyboard);
}
private void OnPause(InputAction.CallbackContext obj)
{
if(gameState.Value == States.PAUSED || gameState.Value == States.NORMAL) pauseMenu.PauseGame();
}
private void OnGrabPressed(InputAction.CallbackContext obj)
{
triggerZone.enabled = true;
Collider2D[] collider2Ds = Physics2D.OverlapCircleAll(transform.position, triggerZone.radius 2f);
foreach (Collider2D collider2D in collider2Ds)
{
if(collider2D.GetComponent<Tilemap>()) return;
var positionX = collider2D.transform.position.x - transform.position.x > 0 ? 1 : -1;
var positionY = camera.transform.position.y - transform.position.y > 0 ? 1 : -1;
DialogueManager.Instance.GetPlayer(positionX, positionY);
collider2D.GetComponent<IInteractable>()?.Interact();
}
InputType();
}
//A few of the methods set a bool to detect if the button is held, as the new input system doesn't have a way to detect that
private void OnGrabReleased(InputAction.CallbackContext obj)
{
triggerZone.enabled = false;
Tentacle.GrabbedObject = null;
Destroy(GetComponent<FixedJoint2D>());
}
private void OnTonguePressed(InputAction.CallbackContext obj)
{
SetShotDirection();
InputType();
}
private void OnTongueHeld(InputAction.CallbackContext obj)
{
isHoldingShootButton = true;
}
private void OnTongueReleased(InputAction.CallbackContext obj)
{
Detach();
isHoldingShootButton = false;
}
private void OnMovementPressed(InputAction.CallbackContext obj)
{
movementAxis = obj.ReadValue<Vector2>();
horizontalMove = movementAxis.x moveSpeed;
InputType();
}
private void OnMovementReleased(InputAction.CallbackContext obj)
{
movementAxis = obj.ReadValue<Vector2>();
horizontalMove = movementAxis.x * moveSpeed;
}
//And in here, where we get the targeting for the tongue, I also switch between the desired visuals - cursor for mouse, and sprite for right stick
private void OnCursorMoved(InputAction.CallbackContext obj)
{
cursorPosition = obj.ReadValue<Vector2>();
if(cursorPosition != Vector2.zero) lastCursorPosition = cursorPosition;
if (playerInput.currentControlScheme.Equals("Gamepad"))
{
Cursor.visible = false;
Cursor.lockState = CursorLockMode.Locked;
isGamepad = true;
cursorSprite.enabled = true;
InputType();
}
else
{
Cursor.visible = true;
Cursor.lockState = CursorLockMode.None;
isGamepad = false;
cursorSprite.enabled = false;
InputType();
}
}
#endregion
Now let's see the changes in other parts that reflect the implementation of the new system. First was Update, where I replaced the GetInputs with the TongueController method, since I still needed to keep track if the shoot button is being held.
void Update()
{
TongueController();
}
private void TongueController()
{
if (isHoldingShootButton)
{
//Like before, if the shoot button is held, it calls the ShootTongue() method, since it needs to keep running to move the tongue's collider towards the target
ShootTongue();
if (!tongue.enabled) return;
//We also update the tongue's collider position after it attached, if it clinged to a moving object
if (movingObject && springJoint.enabled)
{
var position = movingObject.transform.position;
var attachPosition = new Vector2(position.x - xOffset,position.y - yOffset);
springJoint.connectedAnchor = attachPosition;
tongue.transform.position = attachPosition;
GrapplePoint = springJoint.connectedAnchor;
}
//And also let the player change the tongue's length if it is attached to a surface
if (tongue.transform.position.y > transform.position.y)
{
springJoint.distance -= (tongueLengthChanger Time.deltaTime movementAxis.y);
}
else
{
springJoint.distance += (tongueLengthChanger Time.deltaTime movementAxis.y);
}
if (springJoint.distance <= 1) springJoint.distance = 1;
if (springJoint.distance >= maxDistance) springJoint.distance = maxDistance;
}
//Finally, that same logic of retracting the tongue is here after the player releases the button, since it need to keep running
if(!tongueRetract) return;
tongue.TongueDetach();
tongue.transform.position = Vector2.MoveTowards(tongue.transform.position, transform.position, shootSpeed 2 Time.deltaTime);
if(Vector2.Distance(tongue.transform.position, transform.position) >= 0.1f) return;
tongue.enabled = false;
springJoint.enabled = false;
movingObject = null;
springJoint.connectedBody = null;
tongueRetract = false;
animation.SetState("Idle");
}
This new TongueController method has some similarities with the original GetInputs. We don't detect the inputs here anymore, but the logic behind the shoot button is still there.
private void SetCursor()
{
//I start by initializing the direction of the tongue according to which input is currently in use
tongueShootDirection = isGamepad ? lastCursorPosition : camera.ScreenToWorldPoint(cursorPosition) - transform.position;
hit = Physics2D.Raycast(transform.position, tongueShootDirection.normalized, Mathf.Infinity,layerMask);
var hasInput = cursorPosition != Vector2.zero;
cursorSprite.enabled = isGamepad && hasInput;
hitCursor.SetActive(isGamepad && hasInput);
hitCursor.transform.position = hit.point;
if (Vector2.Distance(hit.point, transform.position) > maxDistance)
{
Cursor.SetCursor(tooFar, Vector2.zero, CursorMode.Auto);
cursorSprite.sprite = tooFarSprite;
}
else if (hit.transform.gameObject.layer == grappableLayerNumber[0] || hit.transform.gameObject.layer == grappableLayerNumber[1])
{
cursorSprite.sprite = canAttachSprite;
Cursor.SetCursor(canAttach, Vector2.zero, CursorMode.Auto);
}
else
{
cursorSprite.sprite = cannotAttachSprite;
Cursor.SetCursor(cannotAttach, Vector2.zero, CursorMode.Auto);
}
}
private void RotateCursor()
{
tongueShootDirection = isGamepad ? lastCursorPosition : camera.ScreenToWorldPoint(cursorPosition) - transform.position;
float angle = Mathf.Atan2(tongueShootDirection.y, tongueShootDirection.x) * Mathf.Rad2Deg;
var targetRotation = Quaternion.AngleAxis(angle, Vector3.forward);
cursorPivotPoint.rotation = isGamepad ? Quaternion.Slerp(cursorPivotPoint.rotation, targetRotation, Time.deltaTime aimRotationSpeed) : targetRotation;
}
The last changes come within the SetCursor() and RotateCursor(), where we have slightly different logic depending on whether the player is using the gamepad or the keyboard & mouse. The changes here are mainly related to changing the active cursor and it's sprite. While using the controller, the crosshair stays a fixes distance from the player, rotating around it. Since that made the tongue less precise, I also added a second icon where the raycast hits a surface, to tell the player exactly where they are aiming (shown below the code, in a video).


Now the showcase of the targeting changing with input (first is gamepad, second is mouse).
And finally, the last addition related to the new input system is a script that will be attached the our sprite tutorials (the graphics within the levels teaching the controls to the player). It detects the current input type from an event Action within the CharacterController.cs script, then changes the sprite accordingly.
Now we finally got where we liked, with control variety for the players.
protected Node[] nodes;
[SerializeField]
protected GameObject movingObject; // this is the platform itself, the object that will be moving; it can actually be any shape desired;
[SerializeField]
protected float moveSpeed; // speed with which the platform will move along the path
protected int currentNodeIndex;
protected Vector2 currentNodePosition;
protected bool forward; // this checks if the platform should reverse its movement
[SerializeField]
protected bool startOn;
[SerializeField]
protected bool loop;
[SerializeField]
protected float timeToWait = 2f; // the delay at each end of the path; if it's a closed loop, this will be set to 0
protected virtual void Awake()
{
nodes = GetComponentsInChildren<Node>();
if(_nodes.Length == 2) loop = false;
currentNodePosition = nodes[currentNodeIndex].transform.position;
if (_startOn) TurnOn();
}
// State is changed to On; This method is made public so outside objects can "turn on and off" the objects, like the buttons and levers mentioned
public void TurnOn()
{
SetState(On());
if (_loop) timeToWait = 0f; // the check to see if the path is a closed loop, so we can remove the delay
}
public void TurnOff()
{
SetState(Off());
}
protected override IEnumerator On()
{
// moving the platform towards the next node
while ((Vector2)movingObject.transform.position != currentNodePosition)
{
movingObject.transform.position = Vector2.MoveTowards(movingObject.transform.position, currentNodePosition, moveSpeed * Time.deltaTime);
yield return 0;
}
// when it arrives (I put a check with a very small distance as a failsafe) we change state to GetNextNode() to change the index
if (Vector2.Distance(movingObject.transform.position, currentNodePosition) <= 0.1f) SetState(GetNextNode());
}
protected IEnumerator GetNextNode()
{
// where the movement starts or resets; we set forward to true and wait for "timeToWait" seconds before moving
if (currentNodeIndex == 0)
{
forward = true;
yield return new WaitForSeconds(timeToWait);
}
// if the plaftorm reached the end of the list we check if it's a loop or not.
else if (currentNodeIndex >= nodes.Length - 1)
{
if (currentNodeIndex > nodes.Length - 1) currentNodeIndex = nodes.Length - 1; // this failsafe was implemented to avoid index going out of bounds
if (loop)
{
// if it is, we set node index to -1, since below we will be adding 1 to the index, making it 0, which loops the movement
currentNodeIndex = -1;
}
else
{
// this failsafe was implemented to avoid index going out of bounds. It was placed here to avoid being run if not necessary
if (currentNodeIndex > nodes.Length - 1) currentNodeIndex = nodes.Length - 1;
// if it is not a loop, we set forward to false, that way the index will start decreasing until it reaches 0, making the platform move backwards
forward = false;
}
yield return new WaitForSeconds(_timeToWait);
}
currentNodeIndex = forward ? currentNodeIndex + 1 : currentNodeIndex - 1; // here I increase or decrease the index depending on movement direction
currentNodePosition = nodes[currentNodeIndex].transform.position; // here I get the position of the current node
SetState(On());
}
protected override IEnumerator Off()
{
// finally, if the platform is set to "Off", I check the platform's position relating to the first node, then I decrease the index to move the platform back to the start.
while (movingObject.transform.position != nodes[0].transform.position)
{
while ((Vector2)movingObject.transform.position != currentNodePosition)
{
movingObject.transform.position = Vector2.MoveTowards(movingObject.transform.position, currentNodePosition, moveSpeed * Time.deltaTime);
yield return 0;
}
if (Vector2.Distance(movingObject.transform.position, currentNodePosition) <= 0.1f) currentNodeIndex--;
if (_currentNodeIndex < 0) currentNodeIndex = 0;
currentNodePosition = nodes[currentNodeIndex].transform.position;
yield return 0;
}
}
Finally, on the FollowPath.cs script itself, we have the methods the states implemented, and the moments where SetState() is called. How it works is, when the platform is On, it gets the position of the first node in the list (index 0), then it starts moving towards that node. When it gets there, it gets the next node on the list, that is, we increase the index by one with the state GetNextNode(). Then the platform starts moving towards that one, an so forth. When we get to the end of the list, two possibilities arise.
1 - The path is open ended, that is, the platform will be going back over the same path. In that case, we set "forward" variable to false and start decreasing the index, until it reaches 0 regain and we restart the logic.
2 - The path is a closed loop. If that is the case, we simply set the index back to 0 so the platform can move from the last node to the first one.
Now, let's see all the steps of the script, how it works in full. The first part is the script it inherits from, ObjectFSM.cs. This is an abstract class that adds a state change script, and two states: On and Off. This was used for most of the objects we implemented that the player can switch on and off with buttons and levers.
protected Coroutine currentState;
protected void SetState(IEnumerator newState)
{
if (currentState != null)
{
StopCoroutine(currentState);
}
currentState = StartCoroutine(newState);
}
protected abstract IEnumerator On();
protected abstract IEnumerator Off();


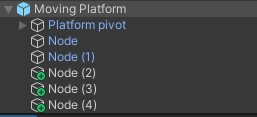
Back in the inspector, the designer can create as many nodes as they desire. These are simply empty objects with the Nodes.cs script attached
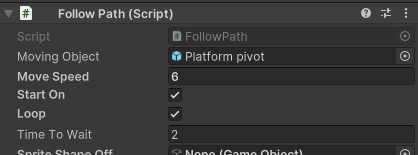
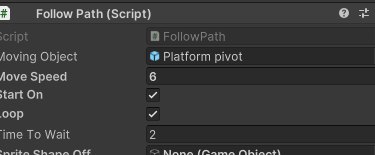
And on the script component, they can choose if the platform starts on, and if the path is a closed loop.
The video below shows the movement with a closed loop. Usually, the platform stops at the end of the path for a brief moment (Time to Wait, above), however, when loop is chosen, this delay is set to 0, so the movement becomes fluid.
//this list is simply of empty scripts, used as components to detect the "nodes"; also, it is protected as another object we used, the rising lava in the escape sequence, inherits from this, but with a few variations
protected Node[] nodes;
[SerializeField]
protected bool startOn;
protected Vector2 currentNodePosition;
protected virtual void Awake()
{
//over here, the script automatically detects the amount of nodes within the platform's path by detecting all the child objects that contain the Node.cs component
nodes = GetComponentsInChildren<Node>();
if(nodes.Length == 2) loop = false;
currentNodePosition = nodes[currentNodeIndex].transform.position;
// if this serialized field is set to true from the inspector, the platforms will start moving as the game is run. Otherwise, another trigger is needed, like a button or lever the player activates during play
if (startOn) TurnOn();
}

This game object had a simple idea. It was simply a moving platform, that would follow a predetermined path. But I tried making it easily customizable for the level designer.
Moving Platforms (FollowPath.cs & ObjectFSM.cs)
public class CameraManager: Singleton<CameraManager>
{
[SerializeField]
private GameObject currentVirtualCamera;
[SerializeField]
private CinemachineVirtualCamera cinemachineVirtualCamera;
[SerializeField]
private CinemachineBasicMultiChannelPerlin cameraNoise;
private float shakeTimer;
private float timeElapsed;
protected override void SingletonAwake()
{
// In this case, nothing is called within SingletonAwake
}
public void SetCamera(GameObject virtualCamera)
{
// With this first check, we can at least reduce a bit of the issue with calling the OnTriggerStay, since the rest of the code will only run if the current virtual camera is different from the one calling this method
if (currentVirtualCamera == virtualCamera)return;
// If it is a new one, we then deactivate the previous camera, set the new one as active, get its cinemachine virtual camera component, then its noise channel component (for camera shake)
if (currentVirtualCamera != null) currentVirtualCamera.SetActive(false);
currentVirtualCamera = virtualCamera;
currentVirtualCamera.SetActive(true);
cinemachineVirtualCamera = currentVirtualCamera.GetComponent<CinemachineVirtualCamera>();
cameraNoise = cinemachineVirtualCamera.GetCinemachineComponent<CinemachineBasicMultiChannelPerlin>();
}
// This method is the one that controls the camera shake; When called, it sets how much the camera will shake (intensity) and for how long (time)
public void ShakeCamera(float intensity, float time)
{
cameraNoise.m_AmplitudeGain = intensity;
shakeTimer = time;
}
// Then on Update, we control the shake itself; When ShakeCamera is called, the shakeTimer will start counting down to zero. While it is above zero, the camera will shake with the chosen intensity; As soon as it reaches zero, we set both intensity and timer back to zero.
private async void Update()
{
// Note this method is async. Before, the camera shake didn't work every time it was called. I'm not sure why that was the case, but forcing Update to wait for a frame got rid of the issue
await Task.Delay((int) (1000.0f Time.deltaTime));
shakeTimer -= Time.deltaTime;
if(shakeTimer > 0f) return;
if(cinemachineVirtualCamera !=null) cameraNoise.mAmplitudeGain = 0;
timeElapsed = 0;
}
}
Finally, the full CameraManager script can be seen here. When the new virtual camera is set, we load both the cinemachine virtual camera component from the GameObject, and the noise component, so we can create some camera shake.
public class Room : MonoBehaviour
{
// We hook up manually within the scene; Each room setup has a collider set to trigger and its VirtualCamera
[SerializeField]
private GameObject virtualCamera;
private void OnTriggerStay2D(Collider2D other)
{
// Then here we check if the player is inside the collider; If it is, we set this room's camera to be the active one within the CameraManager
if (!other.CompareTag("Player")) return;
if(CameraManager.Instance) CameraManager.Instance.SetCamera(virtualCamera);
}
}
Alright, but how does our setup work, then? Well, it is quite simple. Each of the aforementioned "rooms" have their own script attached. The only thing that does is check for the player's presence with a OnTriggerStay2D, then it sets its VirtualCamera as the current one. I'm aware that is not the most efficient way, since it will keep detecting the player, and indeed my first option was to use a OnTriggerEnter2D, but due to how some of the rooms were setup, a few issues I won't get into here surfaced. So we switched to OnTriggerStay2D to fix that. We're all familiar with the concept of time constraints and all that being the enemy of efficiency, so we went with "what fixes our issues right now". As Todd Howard stated: "it just works".
public abstract class Singleton<T> : MonoBehaviour where T : Singleton<T>
{
public static T Instance;
protected void Awake()
{
// Here I check if there is already an instance of the class. If not, I set it up and call the SingletonAwake(), which is and extra custom Awake in case there is anything I might want to run.
if (Instance == null)
{
Instance = GetComponent<T>();
SingletonAwake();
}
// If there is already an instance active in the scene, I delete the new one, so there is never a duplicate
else {
Destroy(gameObject);
}
}
abstract protected void SingletonAwake();
}
Camera Manager (CameraManager.cs & Room.cs)
Our level designer is a big fan of the Cinemachine tool within Unity to control the camera. Our setup consisted in "rooms", that is, collider zones that had their own virtual camera with its own configurations. To only have one of these active at any given time, I created the CameraManager script that would, as the name implies, manage the cameras within each scene, telling the game which was the correct one to have active. This follows the singleton pattern, and while I know this is sometimes considered taboo, I honestly think it is a very handy way to work with a few things within a game. This was one such case. It might be because I'm still inexperienced, but having a single object take charge of this very specific functionality made sense in my head. And don't worry, I did it the "correct" way, by having a parent script to check for duplicates and delete them.
public class PlayerAnimation: MonoBehaviour
{
private Animator animator;
// Here we hash all the animations within the animator so we can call the CrossFade and transition between them
private static readonly int Idle = Animator.StringToHash("Idle");
private static readonly int Gross = Animator.StringToHash("Gross");
private static readonly int Hook = Animator.StringToHash("Hook");
private int currentState;
private float lockedTill;
private bool gross;
private bool hook;
private void Awake()
{
animator = GetComponent<Animator>();
}
private void Update()
{
// In Update, we get the current state (changed from different scripts). If it is the same as the current state, we just return. Otherwise, we transition the animations and set the new state as the current state
var state = GetState();
if(state == currentState) return;
animator.CrossFade(state, 0, 0);
currentState = state;
}
private int GetState()
{
// Here we set the current state according to specific triggers. The lockedTill/LockState method simply serves to keep the character in the same state for a while longer, guaranteeing the animation plays fully. Handy for animations who might be a little longer (like attack animations, for instance).
if (Time.time < lockedTill) return currentState;
if (gross) return LockState(Gross, 0.2f);
return hook ? Hook :Idle;
int LockState(int s, float t)
{
lockedTill = Time.time + t;
return s;
}
}
public void SetState(string state)
{
// Finally, this switch/case just telld GetState which state to set as current state
switch (state)
{
case "Gross":
gross = true;
hook = false;
break;
case "Hook":
gross = false;
hook = true;
break;
case "Idle":
gross = false;
hook = false;
break;
}
}
}
Now, let's look at the code:
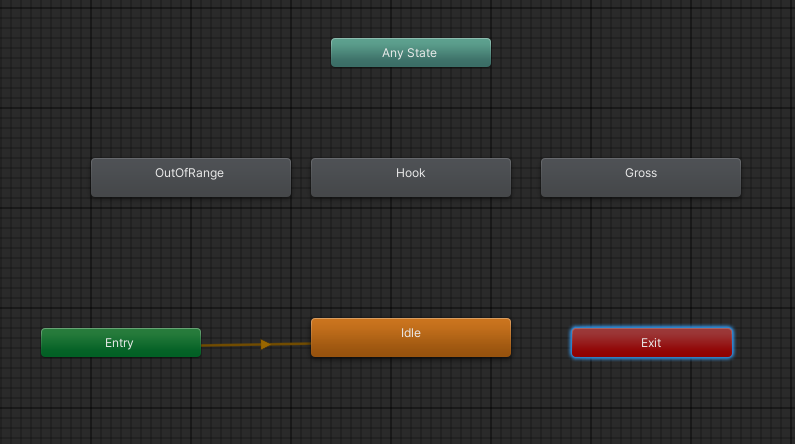
Animation Controller (PlayerAnimation.cs)
As many others, I'm not a big fan of the Unity Animator. It's a pretty handy tool, but can get out of hand quickly depending on how many animations you have. Also, sometimes the triggers and transitions have some issues or don't behave properly when called within code. While we didn't have that many animations, we faced the transition issues, where some animations weren't being properly triggered. Sometimes, one or two would simply stop being called.
So, I decided to try using the CrossFade method, and have an external controller with all the animations. And how does it work? It's a class where we have a reference to each of the animations. Then, during Update we check the player's state to determine which animation to play. The state, in turn, is changed similar to how we would change the animations within the animator.
Credits to this method go to Tarodev, on YouTube. I simply adapted his code to my needs. Link : https://www.youtube.com/watch?v=ZwLekxsSY3Y
As we can see below, this makes the animator much cleaner, since we don't have to configure transitions between animation states.